Trying new painting techniques - sponging
One of my favourite parts of the hobby is to try out new painting techniques. I really enjoy taking techniques and trying to optimise for the best result with the least time. Currently the newest fad seems to be using makeup sponges to achieve gradients (I’ve linked a video below demonstrating the technique). Let’s see what we can do with them, when compared to airbrushes (the most common comparison):
Advantages:
- Cheaper
- Easier to avoid overspray
Disadvantages:
- Not as smooth transitions
- Hard to reach crevices
Advantage or Disadvantage?
- Leaves a speckled, textured finish
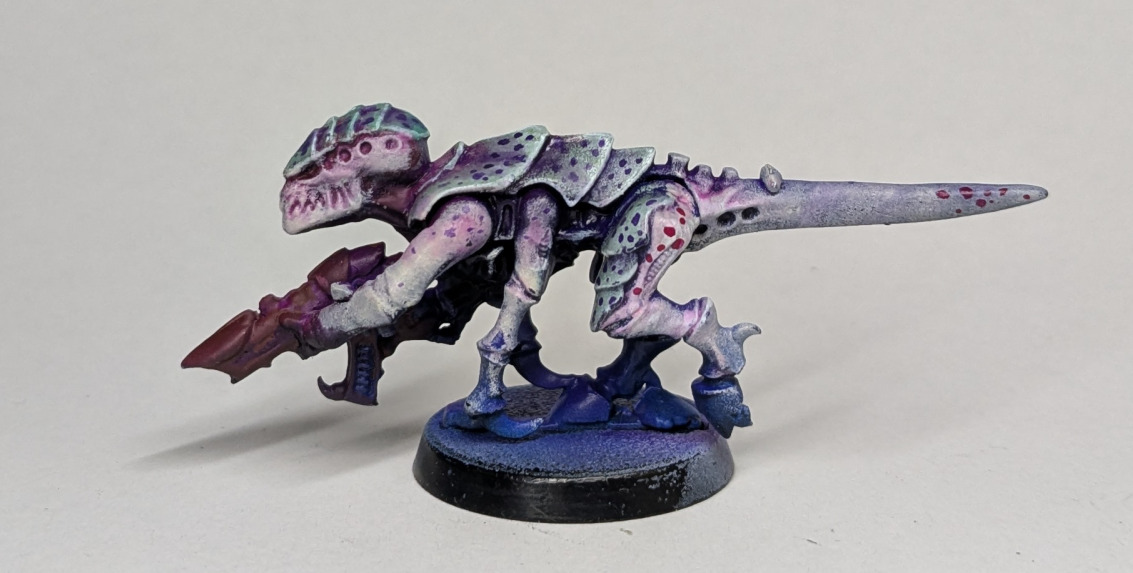
So, how can we maximise the benefits and reduce the downsides of makeup sponges? My first thought is that sponging is good for models with two large surfaces of different colours. Airbrushes struggle with this because of the overspray, but sponges are a bit easier to control. With sponges, it’s hard to get in the recesses to get a solid base coat. However, what if we want colours underneath to show through? Another speed painting technique is underpainting with interesting colours, then only painting highlights, leaving the recesses as the underpaint. This reduces the amount of brushstrokes. We could combine sponging over the top of this, the sponge won’t apply paint to the recesses, leaving the interesting undertone visible. I tested this on a random model and you can see the results below.
When starting a new paint scheme, I find it useful to define what I want the model/army to look like before I put any paint on it, both in terms of theme and quality. I want this army to look like they’ve just emerged from dark, subterranean tunnels. For quality, I’m aiming for a striking tabletop quality with lots of contrast, without being the technically best I can execute. Mainly I want to get a model where the basecoats and ‘boring stuff’s are done quickly. However I don’t mind spending a bit more time adding cool details and colour. With that in mind, lets get started.
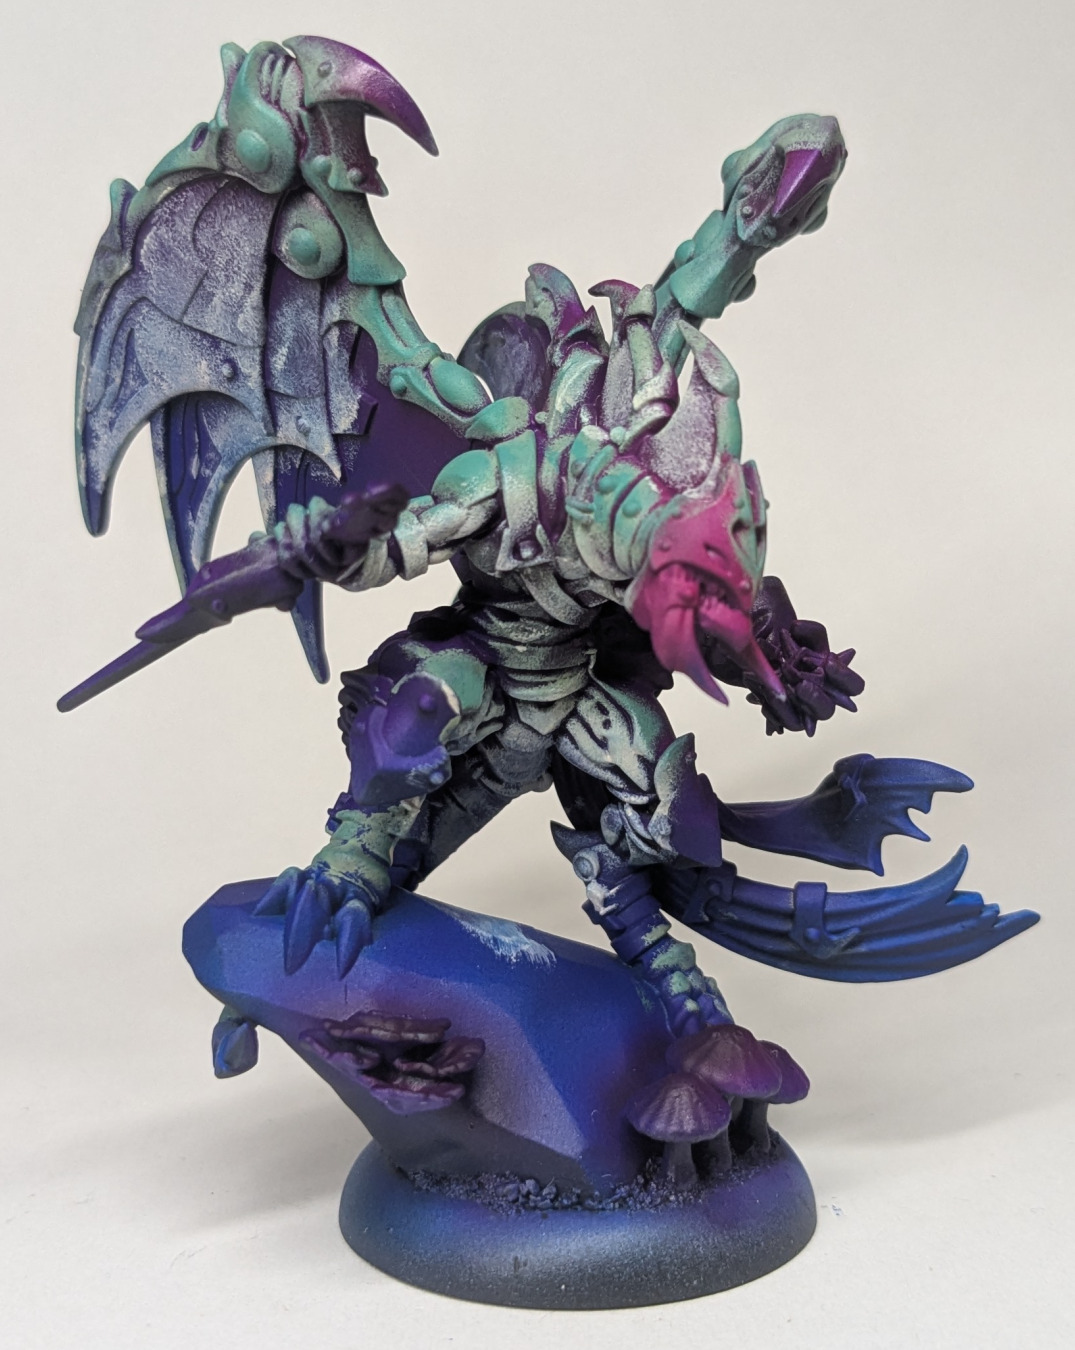
First I wanted to create the interesting underpainting using my airbrush. I decided on blue -> purple -> magenta shift from the linked video because I already know that it looks good. From a black -> white zenithal, I applied purple on the body and middle of the wings. I started with this because I wanted to make sure the model was primarily purple. In addition, I also put purple on the mushrooms because they will be glowing. With your main colour, it’s usually best to cover more of the model than you think, since the next steps will start to obscure or tint it.. Creating a smooth gradient is a bit tricky but worth it. I used purple ink with a decent amount of airbrush thinner. The magenta was placed on the focus areas of the model, the head and the top of the wings. Lastly, blue was added to the ‘boring’ bits like the base and bottom of the model.

Yeah I know, it’s a bit ironic that I used an airbrush as the first step, where one of the alleged ‘advantages’ of the makeup sponge technique is that you don’t need an airbrush. But I think the sponging offers enough in this case that it’s worth using it.
I sponged on some desaturated green on the scales, and some off white on the underbelly. I also ended up sponging on some more saturated jade on top of the desaturated green because I thought the test model above didn’t have enough contrast between the scales and the underbelly. However the sponging didn’t go so well on the large, flat wings…
The reason I think the sponging works, on this model in particular, is because this model is made up of lots of little flat panels (notice that Trovarion’s miniature in the video at the start is similar). Tapping the sponge highlights the top of the panel while leaving the bottom the interesting undertone. I think this is more effective than other ‘fast’ methods. If I used contrast paints, the top of the panels are too flat and the paint would pool. If I airbrushed I would lose the shadows and undertones. That being said, I did end up airbrushing the wings. Let’s keep going and fill in most of the details.
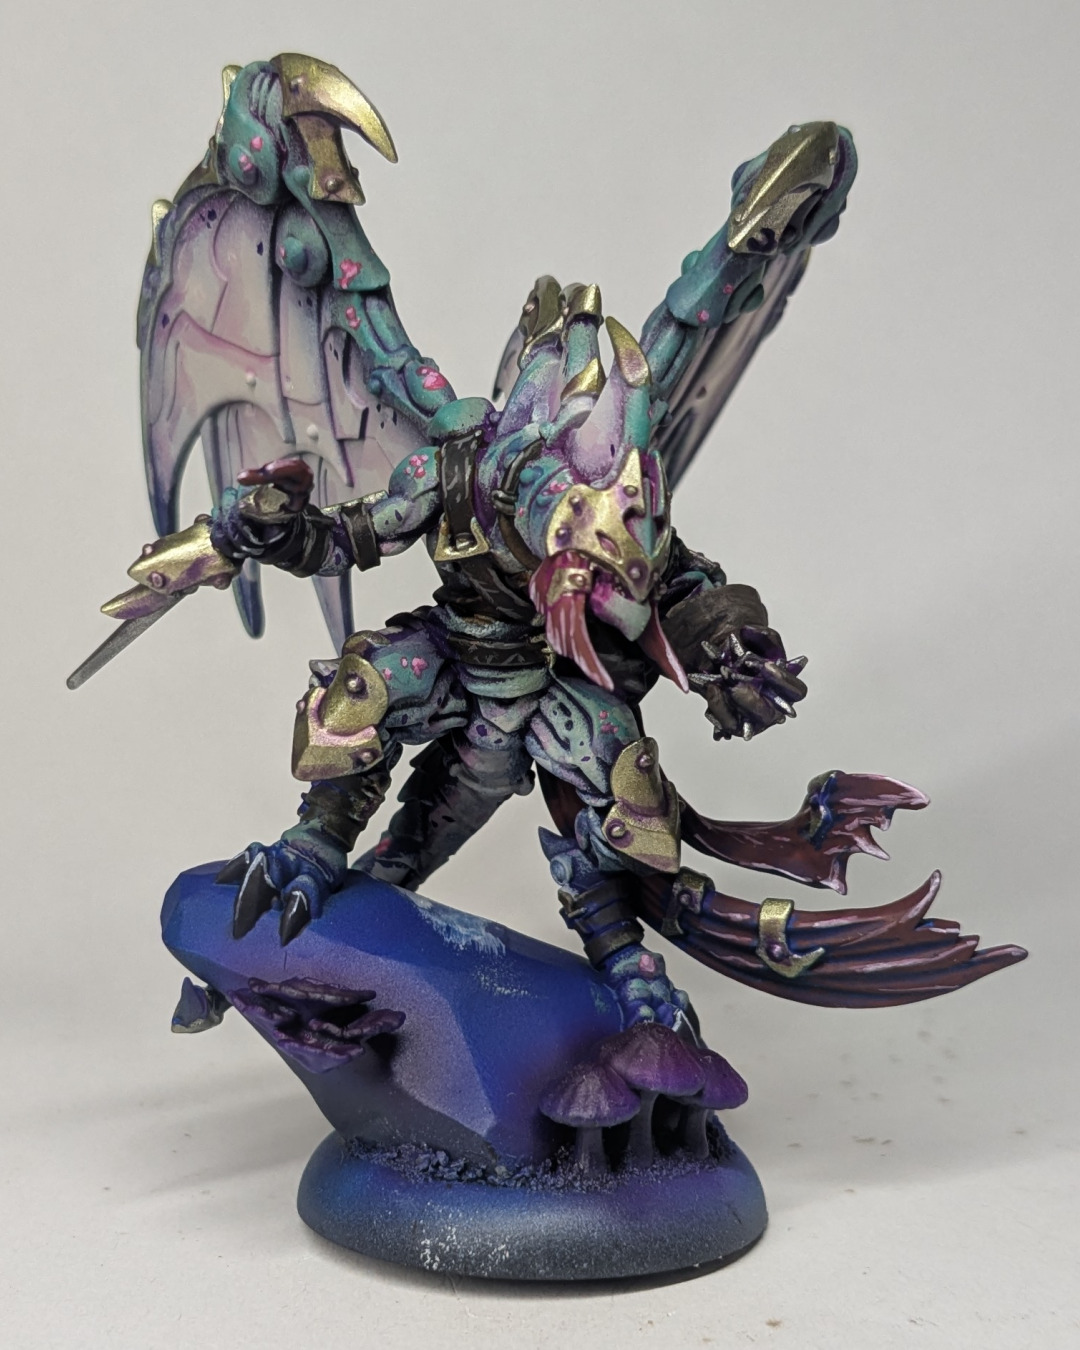
So, most of the way there. Let’s take a step back and see how we feel. Compared to the initial test model, I changed from purple spots on the scales to pink spots. I’m unsure if this pops too much, I might go midway and try a dark magenta next. I would also make the purple spots on the underbelly/wings more transparent next time. We’re getting close, just highlights, base and finishing touches.
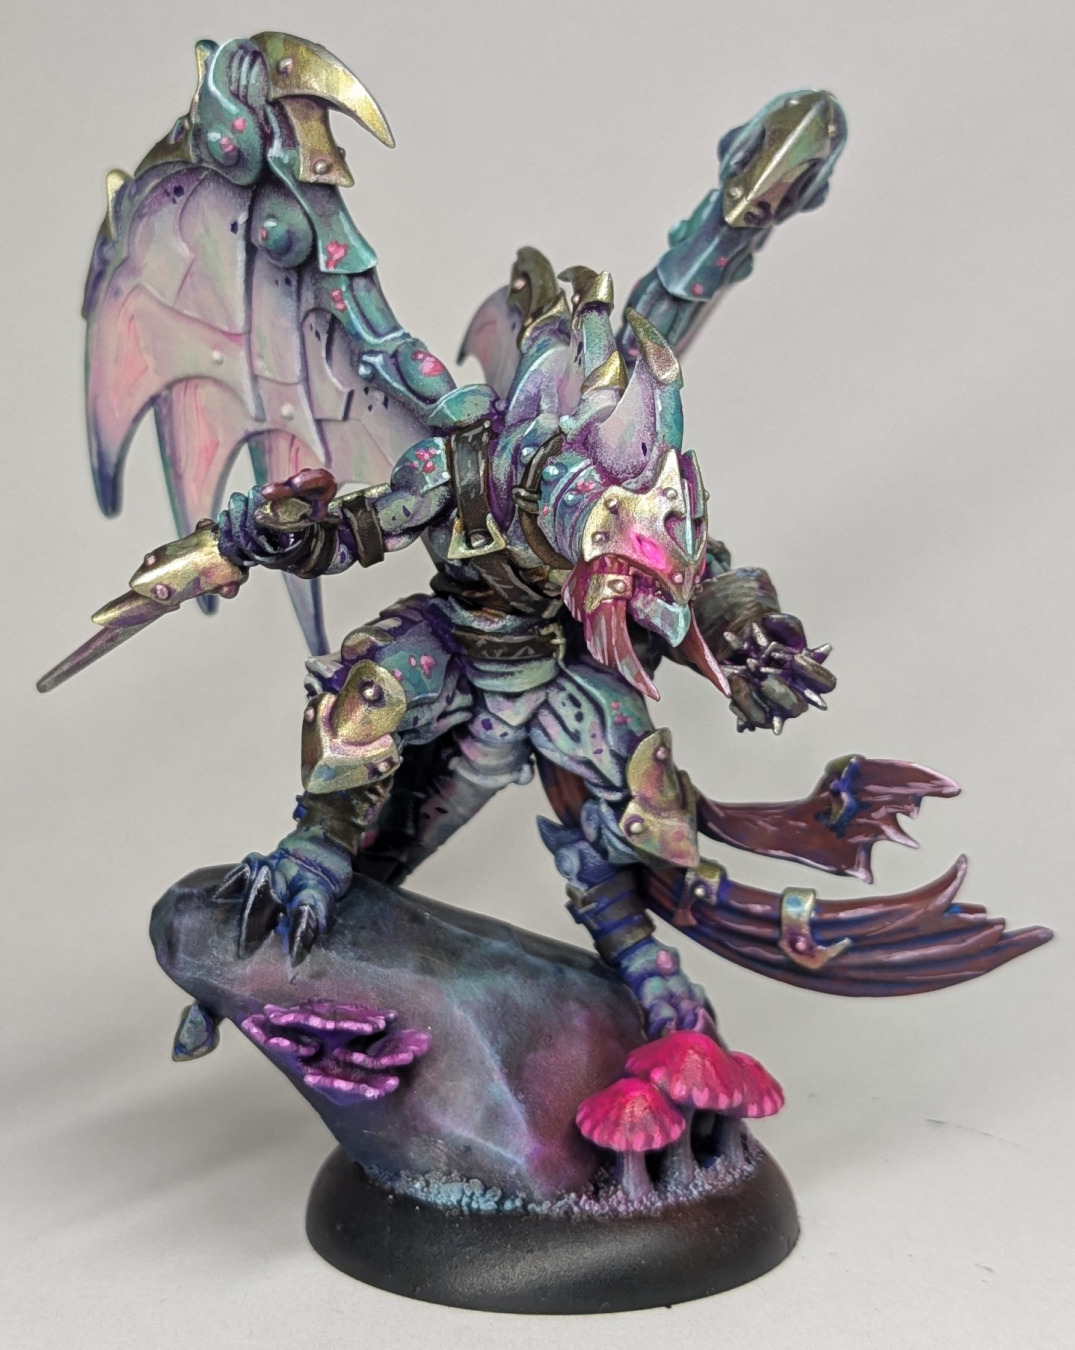
All done! I really like how the scales came out. The blends from the underbelly, to the desaturated green, to the saturated jade came out really well, and the sponge texture lends itself to natural, mottled scales. The sponging did a great job of leaving the undertones in the recesses of the scales. I found that the transition from the white-ish underbelly, to the scales looks natural while still having some definition, it doesn’t have the ‘fuzzing’ like an airbrush would. In addition, these models are notorious for the different materials being hard to define. With this method I was able to ignore that and just sponge. I left anything I was unsure about, or anything in a hard to see place, in the underpaint colour, and it still looked painted.
In terms of getting the rest of the model done, I also really enjoy not putting paint on the shadows for places like the cloth, just letting the underpainting show through. It feels like I’m not wasting time, I only need to paint the minimum number of layers. I also glazed a lot of colours from my palette all over the model, especially on the metals, representing light bouncing and reflecting on the surfaces. It’s something I’ve been looking at incorporating into this army. It makes the model look more interesting, but ultimately, it’s just fun to do.
In summary, it definitely wasn’t a speedpaint job. Around five painting sessions, but I was doing a lot of experimenting. However I did feel like I achieved my goal set out at the start, the boring bits were over quickly and I had a really enjoyable time painting this model. I’m looking forward to getting more models painted up in this scheme!